“How to Make a Perfect Chicken Brine for Juicy Meat”
How to Make a Perfect Chicken Brine for Juicy Meat: A Step-by-Step Guide
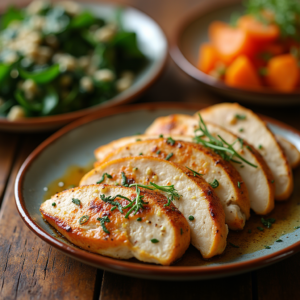
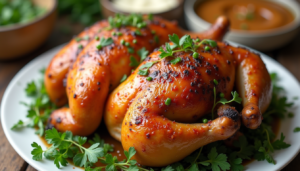
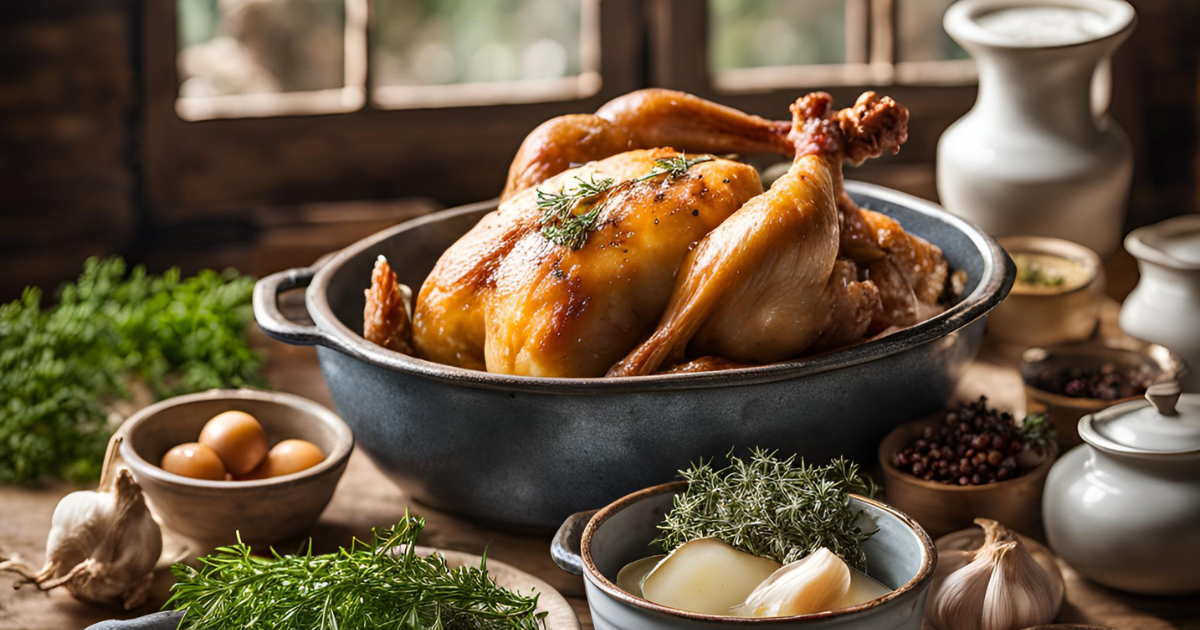
Imagine cutting into a perfectly roasted chicken, its skin golden brown and crisp, the meat juicy and bursting with flavor. The secret behind such a tender and flavorful roast isn’t just in the seasoning or the cooking technique; it all starts with one crucial step — brining. If you’ve never brined your chicken before, you’re missing out on a simple, effective method to elevate your poultry game. This guide will show you how to make the perfect chicken brine, ensuring your chicken is always juicy, flavorful, and tender, no matter how you choose to cook it.
Table of Contents
The Magic Behind Chicken Brine: Why It Works
What is Chicken Brine?
At its core, chicken brine is simply a solution of salt and water (and sometimes sugar), used to soak chicken before cooking. While the concept may sound simple, the results can be extraordinary. Brining helps your chicken retain moisture during cooking, ensuring each bite is succulent and tender.
When chicken soaks in a brine solution, the salt draws water into the meat, making it plump and juicy. It also helps break down some of the proteins in the chicken, making it more tender. Brining is especially useful for lean cuts of chicken, like breasts, which can dry out easily without some extra moisture.
Why Brining Transforms Chicken
The magic behind brining lies in osmosis. When the chicken absorbs the salty water, the proteins in the meat undergo a change, which helps the chicken hold onto more moisture as it cooks. Not only does this make the meat juicier, but the process also imparts flavor from the salt and any additional aromatics (like herbs or spices) you choose to include in the brine.
This method can enhance the taste of your chicken dramatically, leaving you with a flavorful, well-seasoned bird. In fact, brined chicken can retain up to 30% more moisture than unbrined chicken, which makes a noticeable difference when you’re biting into that juicy meat.
Essential Ingredients for the Perfect Chicken Brine
The beauty of a good brine is in its simplicity. You don’t need complex ingredients to achieve excellent results, but you do need to use the right balance. Here’s what you’ll need:
Basic Ingredients for Chicken Brine:
| Ingredient | Purpose | Measurement |
|---|---|---|
| Water | Base for the brine | 4 cups |
| Salt | Enhances flavor & moisture | 1/4 cup |
| Sugar | Helps with browning and flavor | 2 tablespoons |
| Optional: Spices & Aromatics | Adds extra flavor (garlic, thyme, peppercorns, etc.) | To taste |
- Water: The foundation of the brine. You need enough to fully submerge the chicken. The amount can be adjusted based on the size of the bird.
- Salt: The most important ingredient. Kosher salt is recommended because its larger grains make it easier to dissolve and measure, ensuring the right balance in the brine.
- Sugar: While not strictly necessary, sugar helps with the caramelization of the chicken’s skin when cooking and adds a slight sweetness to balance the saltiness.
- Aromatics: Adding herbs and spices is where you can get creative. Popular choices include garlic, peppercorns, thyme, rosemary, and even citrus zest for added freshness.

Step-by-Step Guide to Brining Your Chicken
Now that you know the ingredients, let’s break down how to brine your chicken perfectly, step by step.
1. Prepare the Brine Solution
Start by combining your water, salt, and sugar in a large pot. You’ll want to heat the mixture on the stove just enough to dissolve the salt and sugar. Stir occasionally to ensure everything is fully dissolved. Once the brine is dissolved, remove the pot from the heat and allow it to cool completely.
If you’re adding any aromatics, now’s the time to add them. Crush garlic cloves, break up fresh herbs, or add spices like peppercorns or a couple of bay leaves. These additions will infuse the chicken with flavor as it soaks.
2. Submerge the Chicken
Once your brine is cool, place the chicken into a large bowl or container. Make sure the chicken is fully submerged. If it’s not, you can use a weight (like a plate or bowl) to keep the chicken underwater. This ensures even brining.
3. Refrigerate for Optimal Brining Time
For optimal results, brine the chicken in the fridge. Brining times vary depending on the cut of chicken you’re using. Here’s a basic guideline:
- Chicken breasts: 1-2 hours
- Whole chicken: 4-6 hours (overnight for the juiciest results)
The longer you brine, the more flavor and moisture will be absorbed, but be cautious not to overdo it, especially with smaller cuts, as this can lead to overly salty chicken.
4. Rinse and Dry
After the brining period, remove the chicken from the brine. Rinse it under cold water to remove any excess salt on the surface. This will help prevent the skin from becoming too salty.
Next, pat the chicken dry with paper towels. Drying the chicken is a critical step, especially if you’re roasting or frying. A dry skin will crisp up beautifully when cooked.
Different Brining Methods for Different Cooking Styles
Brining is versatile and works wonderfully across different cooking methods. Whether you’re roasting, grilling, or frying, brining ensures your chicken comes out perfectly juicy every time.
Brining for Roasting
When you’re roasting chicken, the brine will keep the meat moist as it cooks in the oven. The moisture from the brine helps the meat retain its juiciness, while the skin crisps up to golden perfection. For a whole chicken, brining for 4-6 hours or overnight is ideal.
Tip: Make sure to let the chicken rest at room temperature for about 30 minutes before roasting. This helps the meat cook more evenly.
Brining for Grilling
Brining is particularly effective when grilling chicken. The brine locks in moisture, preventing the chicken from drying out over the high heat of the grill. This is especially important for boneless cuts like chicken breasts, which are prone to dryness.
Tip: If you’re grilling chicken, consider adding a little extra sugar to your brine. It will help the chicken get a nice, crispy char without burning.
Brining for Frying
Fried chicken is a classic favorite, and brining plays a key role in making it extra crispy on the outside while staying tender and juicy on the inside. A good fried chicken brine will ensure that the meat stays moist during the deep-frying process.
Tip: After brining, coat the chicken in a seasoned flour mixture for a crispy, golden crust.
Common Mistakes to Avoid When Brining Chicken
While brining is relatively simple, there are a few common mistakes that can lead to disappointing results. Here’s how to avoid them:
1. Using Too Much Salt
Salt is essential for brining, but too much can make your chicken overly salty. Always measure your salt carefully, and use kosher salt for the best results. If you accidentally overdo it, you can dilute the brine with more water.
2. Brining for Too Long
Over-brining, especially with small cuts like breasts, can cause the meat to become too salty or mushy. Stick to the recommended brining times: 1-2 hours for chicken breasts, and 4-6 hours for a whole chicken.
3. Not Rinsing the Chicken
If you skip the rinsing step, your chicken may end up too salty. After brining, give your chicken a quick rinse under cold water to remove any excess brine before cooking.
Chicken Brine Variations: Add Your Personal Touch
Once you get the basic brine down, you can start experimenting with different flavors to make your chicken stand out.
Smoked Chicken Brine
For a smoky twist, try adding liquid smoke, smoked salt, or smoked paprika to your brine. This creates a deep, savory flavor that’s perfect for grilling or roasting.
Herb-Infused Chicken Brine
Infuse your brine with fresh herbs like rosemary, thyme, or sage for an aromatic experience. This works particularly well if you’re roasting the chicken and want to give the meat a herby depth of flavor.
Citrus-Infused Chicken Brine
For a refreshing, zesty flavor, try adding citrus zest (lemon, lime, or orange) to your brine. This will give your chicken a bright, fresh taste that balances the saltiness.
Conclusion: Unlock the Secret to Perfectly Juicy Chicken Every Time
By brining your chicken, you can consistently achieve tender, juicy, and flavorful results, whether you’re roasting, grilling, or frying. Brining is a simple yet effective technique that will elevate your cooking and leave you with the juiciest chicken every time.
So, the next time you’re preparing chicken, make sure to incorporate this game-changing step. Your taste buds will thank you, and your guests will be impressed with your culinary expertise. Don’t forget to experiment with different brine variations to make your chicken uniquely yours. Happy cooking!
FAQ: Your Chicken Brine Questions Answered
How long should I brine chicken for the juiciest results?
- Brine chicken breasts for 1-2 hours, and a whole chicken for 4-6 hours or overnight.
Can I use table salt for chicken brine?
- Kosher salt is recommended for brining. If you use table salt, be sure to reduce the amount since it’s more concentrated.
Is brining necessary for every chicken recipe?
- While it’s not mandatory, brining is highly recommended for any recipe where you want juicy, tender chicken (especially roasting or grilling).
Can I reuse the chicken brine?
- It’s best not to reuse brine due to bacteria buildup and the loss of flavor.
Can I brine frozen chicken?
- Yes, but make sure the chicken is fully thawed before submerging it in the brine.
Brining is an easy step that makes all the difference in the final result. Try it today, and watch your chicken transform into a succulent masterpiece!